
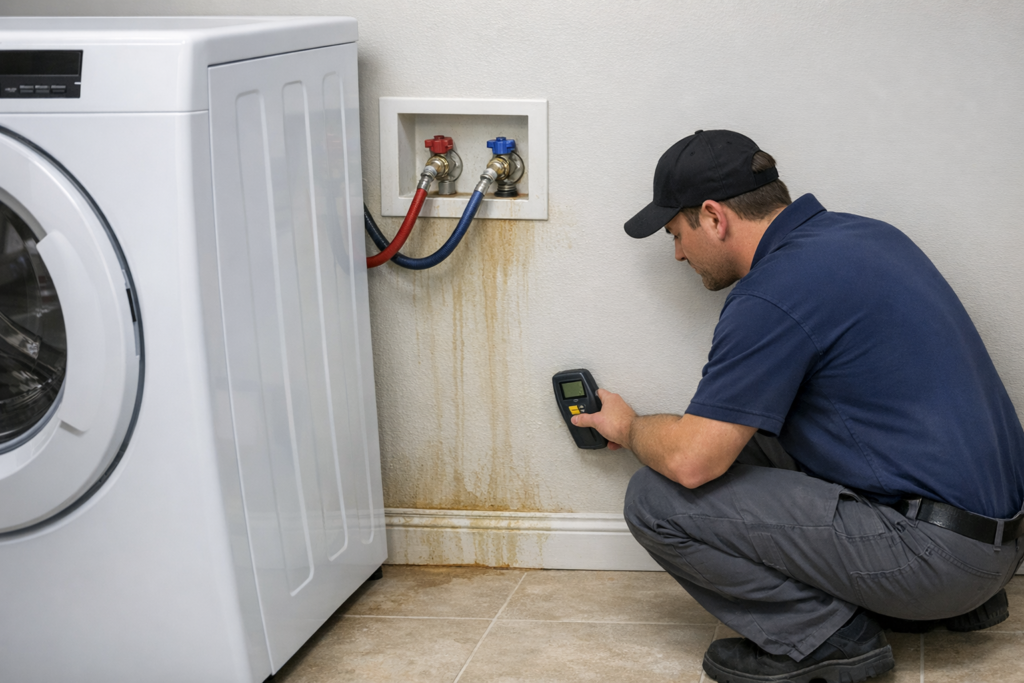
Washing machine supply leak damage needs two separate answers: what stopped the water, and what happened to the materials it reached. If you discover water near a washer in Las Vegas, keep out of standing water, avoid the appliance and nearby electrical components, and arrange safe source correction. From a dry, safe location, record the discovery time, visible water path and changes to adjoining walls or flooring. A professional assessment should then establish the affected materials, concealed moisture concerns and appropriate cleanup and drying scope.
This guide focuses specifically on the pressurized supply side: the hot and cold hoses, their connections and the wall-side supply fittings. It is not a guide to tightening fittings or diagnosing a washer by running it again. The aim is to help you report useful observations and ask better assessment questions without moving the appliance or disturbing wet building materials.
1. Understand What Washing Machine Supply Leak Damage Can Involve
A supply connection can leak while a washer is idle because the supply hoses may remain under pressure whenever their valves are open. Water found hours after a laundry cycle therefore does not establish when the release started. A small connection leak and a split hose can also create very different water paths. The amount visible in front of the washer is not a reliable measure of how much entered the room assembly.
Water may run down the rear wall, collect under the appliance, follow the floor perimeter or pass through gaps around plumbing penetrations. A supply box above floor level can introduce moisture to the wall before a puddle becomes visible. Whether that happened requires inspection; a stain beneath the box alone does not establish the entire route.
Keep source descriptions provisional until the appropriate professional confirms them. Say that water was visible beneath the cold-water connection, rather than declaring that a hose failed. The valve, hose coupling, wall fitting or another nearby component may need investigation.
Presto Water Damage provides appliance leak damage cleanup and restoration. Plumbing or appliance source repair should be identified separately from that restoration work. For broader washer problems involving drains or the appliance itself, see the related guide to checks after a washing machine leak is shut off.
2. Set Safe Boundaries Before Recording Observations
Do not enter standing water to reach washer valves, a plug, an outlet or electrical equipment. Do not unplug a washer from a wet location, test whether it still runs or reach behind it to investigate. If a known water shutoff is accessible by a completely dry, safe route, it may be possible to stop the supply there. Otherwise, keep clear and request appropriate help. Do not force a seized valve.
Heavy appliances can tip, strain connected hoses or conceal unsafe conditions. Leave moving a washer, separating stacked units and accessing the rear connections to people equipped for that work. A photograph is not worth leaning over a wet machine or standing on unstable flooring.
From an unaffected doorway or another safe position, useful observations include:
- Whether water appears to be continuing, without approaching to confirm it.
- The first place water was noticed and the visible direction of spread.
- Changes along the rear wall, sidewall, doorway and adjacent room perimeter.
- Swollen trim, raised floor edges, stained drywall or wet stored items.
- Any unusual odor or visible suspected growth, reported without touching or disturbing it.
If water has reached a room below, keep away from sagging or bulging ceiling areas and do not open or puncture them. Report that location separately. If sewage or mold is suspected, do not use household fans to move air through the affected area. Initial uncertainty should lead to more cautious access, not more hands-on investigation.
3. Build a Source History the Plumber Can Use
A useful history separates the last known normal condition from the discovery time. Record when the laundry room was last seen dry, when the washer last ran, when water was first noticed and when any shutoff occurred. If nobody checked the room overnight or during an absence, state that the actual release duration is unknown. Discovery time should not become an assumed start time.
Tell the plumber or appliance professional about recent installation, servicing or movement of the washer if you know it occurred. Provide existing hose replacement records or appliance information rather than pulling the machine out to find a label. Also explain whether moisture had appeared previously, even if it disappeared between uses.
Questions worth asking include:
- Which component was confirmed as the source, and what findings support that conclusion?
- Were both supply connections and the wall-side valves evaluated?
- Does the finding involve the hose, coupling, valve, appliance inlet or concealed plumbing?
- What repair was completed, and who will confirm it is appropriate to restore service?
- Are there unresolved source questions that affect the restoration plan?
Do not restart the washer to reproduce the leak for a photograph. Professionals should control any source-related testing. Ask for a written description of the repaired component and any remaining limitations. Replacing a hose may stop an entry path, but it does not establish that the wall, flooring or room below is dry.
4. Ask How the Assessment Follows Water Beyond the Washer
The restoration assessment should connect your observations with a material-based moisture map. Start with the rear wall, the floor beneath the washer and adjoining wall bases, then follow findings toward doorways, shared walls and nearby rooms. The goal is neither to assume widespread damage nor to stop at the edge of the visible puddle.
Ask which locations were accessible and which were not. A washer left in place may limit floor inspection. A finished wall may conceal insulation or framing. Those limitations should appear in the assessment, along with the proposed next step and any authorization needed for access. An uninspected location should not be described as confirmed dry.
Useful professional assessment questions include:
- Which materials and floor layers were checked, and where were readings recorded?
- Were nearby unaffected materials available for meaningful comparison?
- What evidence suggests moisture entered the wall rather than staying on its surface?
- Were both sides of a shared wall or the area below considered where findings warranted it?
- What remains uncertain, and what additional access would resolve that uncertainty?
A moisture meter reading needs context: the material, instrument approach and comparison location all matter. Different products should not be treated as interchangeable simply because they produce numbers. The guide to moisture readings and material comparisons explains why a single reading is not a complete verdict.
If the floor looks normal after surface water is removed, ask how concealed layers were evaluated. The related discussion of water damage beneath flooring helps explain why surface appearance and assembly moisture can differ.
5. Make Retention and Removal Decisions by Material
Not everything near a supply leak needs replacement, and not everything that looks intact can automatically stay. Decisions should reflect water contact history, physical condition, accessibility, cleaning needs and whether drying can be achieved and verified. Water beginning at a supply hose should not be assumed suitable for unrestricted handling after unknown exposure to surrounding materials.
Drywall and insulation: Ask whether the wall surface, lower edge and concealed cavity have been assessed separately. Staining alone does not determine removal, while loss of integrity or inaccessible wet layers may change the plan. Where selective access is proposed, ask what it is intended to establish. Do not cut openings yourself. See the guide to evaluating whether wet drywall can be retained for the factors behind that decision.
Baseboards and trim: Swelling, separation and finish changes can identify locations worth checking, but the trim is only one component. Drywall edges and floor joints behind it may require their own evaluation. Drying a wood trim piece does not necessarily reverse distortion, and replacement trim should not conceal an unresolved moisture condition.
Flooring and substrate: Identify the actual product if records are available. Tile, sheet flooring, laminate and floating vinyl have different assemblies beneath their visible surfaces. A water-resistant finish does not establish that the underlayment, adhesive or substrate escaped exposure. Ask what supports drying in place or selective removal, and how retained layers will be checked.
Contents and cabinetry: Laundry baskets, boxed supplies, shelving and cabinet bases should be recorded separately from the building. Avoid moving items through water or disturbing suspected contamination. Ask which components can be cleaned and dried, which are physically damaged and which need further assessment before treatment or disposal.
6. Separate Extraction, Drying Verification and Rebuild
Source correction stops the release. Mitigation addresses the immediate water damage through steps such as extraction, appropriate cleaning and necessary material removal. Structural drying manages moisture in materials suitable to retain. Rebuild restores the finishes or components removed or damaged. These stages can require coordination, but one completed stage is not proof that the next is complete.
If water remains, ask what professional water extraction will address and what moisture assessment follows it. Removing free water from a laundry room does not remove all absorbed moisture from wall edges or floor layers. An extraction scope should not be mistaken for a final drying report.
For retained materials, ask how the structural drying and dehumidification plan relates to the identified assembly. Equipment placement, access and monitoring should respond to findings. Do not reposition equipment, change settings or disconnect it without discussing the issue with the restoration team.
Drying duration depends on the affected materials, exposure, access and measured progress. Las Vegas outdoor conditions do not establish that an enclosed wall or covered floor has dried. Ask which recorded locations will be rechecked, what completion criteria apply and how remaining limitations will be communicated.
Before approving finish work, request the source-repair status, drying completion findings and any unresolved material concerns. The scope for water damage repair and reconstruction should then identify drywall, trim, flooring and finish boundaries. Cosmetic work should not be used to hide an assembly whose condition remains uncertain.
7. Keep Useful Records and Reduce Repeat-Leak Risk
Build one file that connects the source, affected locations and work decisions. Photograph the room from safe access points, then capture visible details without moving the appliance. Use dates and plain room descriptions so later reports can be matched to the same wall or doorway. Avoid delaying necessary response to create a perfect photo record.
Keep the following records together:
- The discovery timeline, including gaps when the room was not observed.
- Source findings, repair invoices and instructions about restoring appliance use.
- Initial moisture locations, assessment limitations and subsequent monitoring reports.
- Written retention or removal decisions and the reasons for scope changes.
- A contents list, work authorizations and separate mitigation and rebuild documents.
The guide to documenting water damage before cleanup provides additional organization tips. If an insurer is involved, ask what information it requests. Documentation supports review but does not establish coverage or guarantee claim acceptance. Renters and property managers should also notify the appropriate building contact and clarify who can authorize access and work.
Once the loss is resolved, discuss supply-hose condition, connection access and appliance clearance with the appropriate professional. Follow manufacturer guidance for hose selection and maintenance rather than assuming one replacement schedule fits every product. Avoid pushing the washer into a position that strains or pinches hoses.
A compatible leak alarm or automatic shutoff device may help identify or limit a future release, but it does not replace maintenance or guarantee protection. Ask about suitability and installation. Keep the shutoff location known and accessible, and report recurring dampness promptly rather than treating it as leftover staining.
Frequently Asked Questions
Can a washing machine supply hose leak when the washer is off?
Yes. The hoses can remain pressurized while their supply valves are open, even when the appliance is idle. Water discovered between cycles may therefore still involve the supply side. That possibility does not identify the failed component; a plumber or appliance professional should confirm the source without you restarting or moving the washer.
Does replacing the leaking hose mean the damage is resolved?
No. Hose replacement addresses the source if that hose was the confirmed problem. It does not establish the condition of flooring, drywall or concealed layers already exposed to water. Ask for source-repair confirmation and a separate restoration assessment, followed by drying verification for materials that are retained.
What should I photograph if I cannot safely reach behind the washer?
Take wider photographs from a dry doorway or other safe location. Record the visible water boundary, wall-base changes and adjoining room conditions. State that the rear connections were inaccessible. Professionals can document those areas after safe access is arranged; there is no need to move a heavy appliance to complete your initial record.
Should laundry room flooring be removed after a supply leak?
Not automatically. The decision depends on the product, underlying layers, water history, damage and ability to dry and verify the assembly. Ask which layers were inspected and what evidence supports retention or selective removal. A normal-looking top surface or a water-resistant product description does not settle that question.
When can the washer go back into normal use?
Ask the source-repair professional to confirm that the supply system and appliance connections are ready for use, and coordinate with the restoration team about equipment, access and floor conditions. Electrical concerns require appropriate professional clearance. Do not assume that a new hose or a dry-looking floor alone means the laundry area is ready.
For help assessing a washer supply leak, contact Presto Water Damage for water damage restoration in Las Vegas. Tell us what you can safely observe, whether source repair has been arranged and which adjoining areas show changes. Call 725-529-5195 to discuss the assessment and next steps.